RobCo Studio
In RobCo Studio, vision projects are created, trained and deployed to the Vision Controller. To create a project, you either upload a CAD model of the part and select a texture, or upload images of the part you want to pick. The pose estimation models are trained automatically and can then be rolled out to one or more Control Units.
The Vision Project page
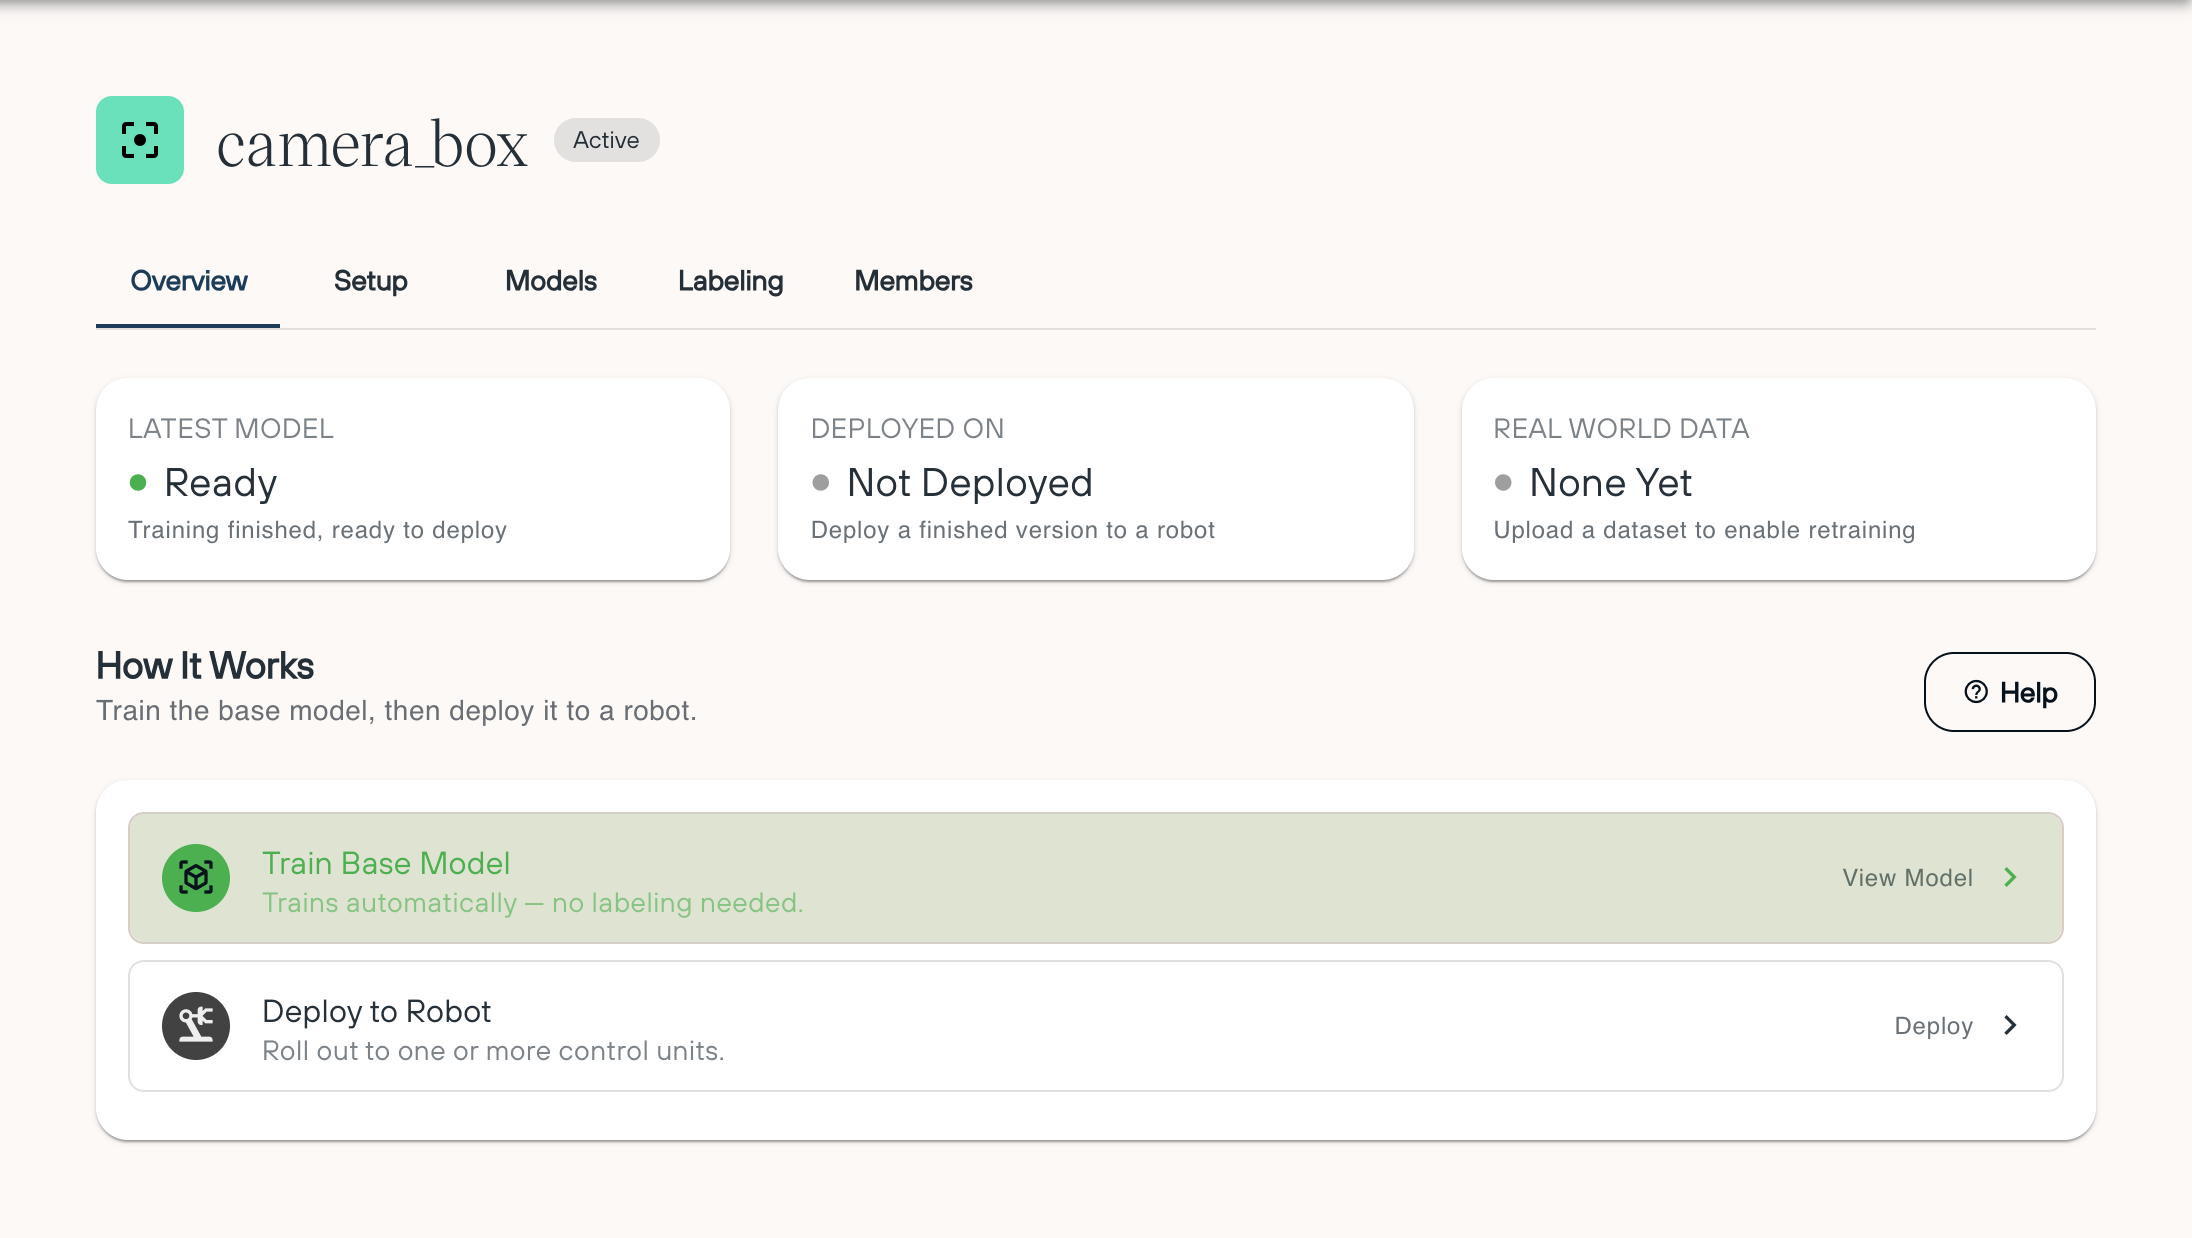
The RobVision section in RobCo Studio lists all your vision projects in a table. Clicking a project opens its own page with the following tabs:
- Overview: Status at a glance and a guided workflow from part definition to deployment.
- Setup: The part definition (CAD model or labeled images), background images and advanced settings.
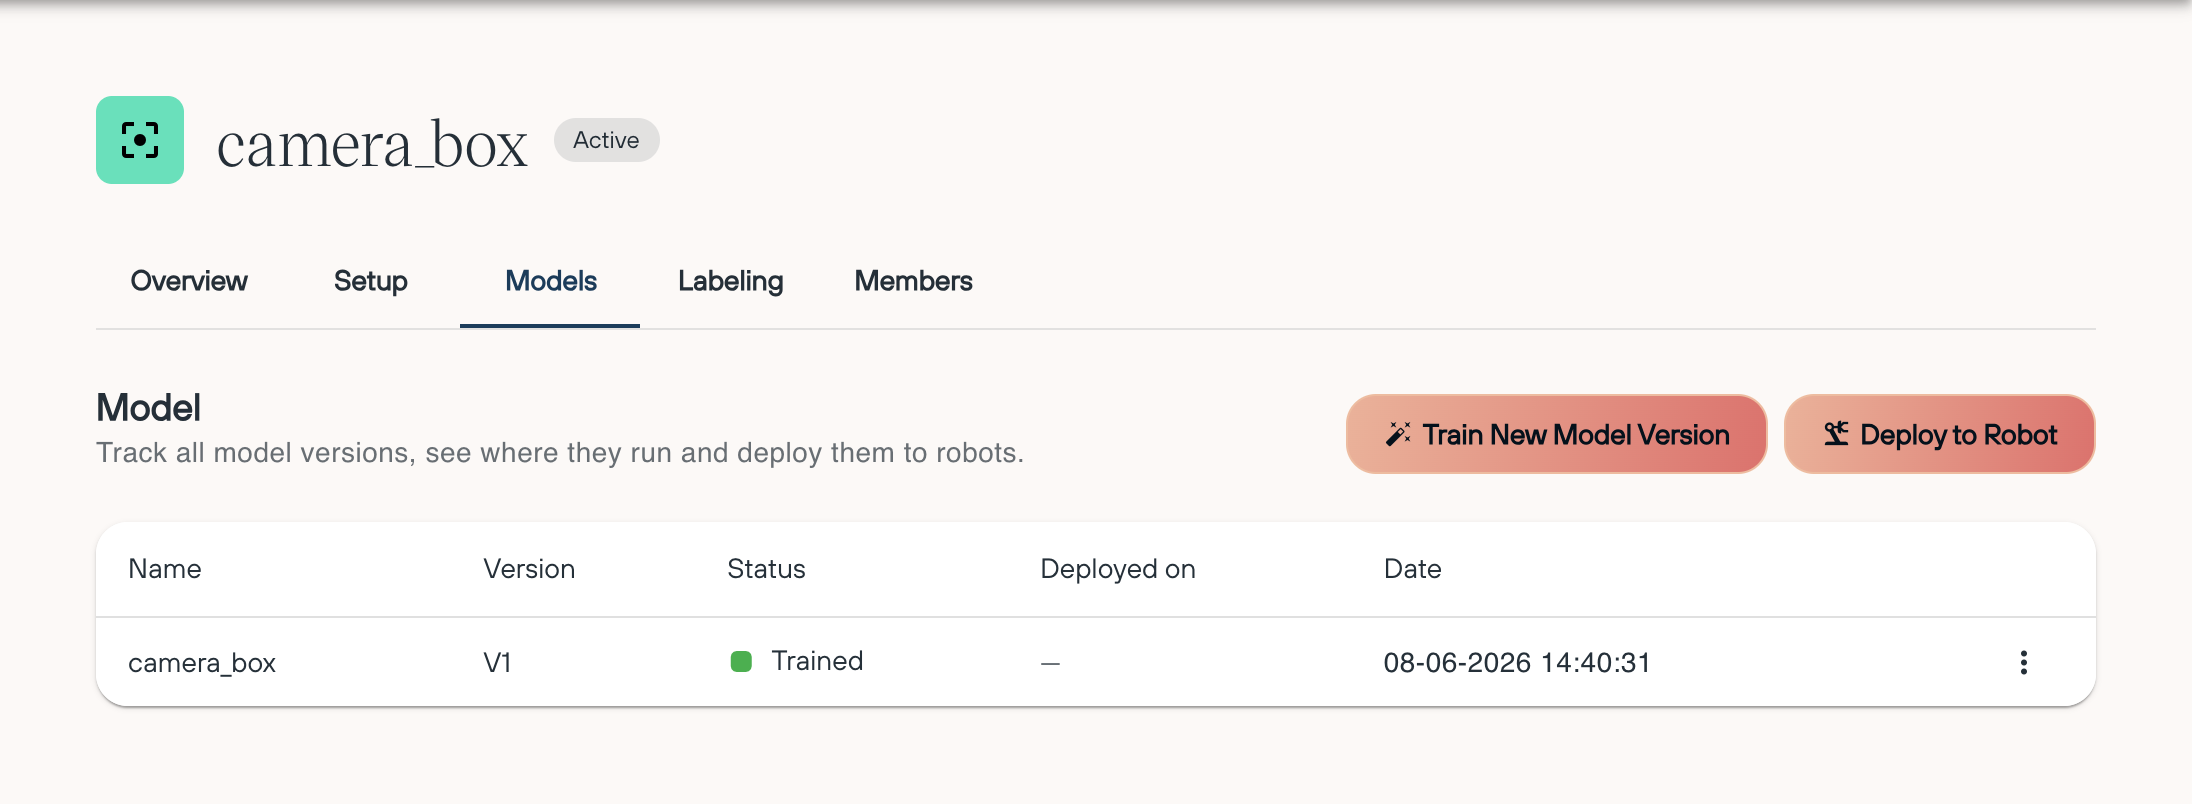
- Models: All trained model versions with their training status, deployments and actions.
- Labeling: Import and label real images to fine-tune the model — see Labeling & Fine-Tuning.
- Members: Everyone who has access to the project.
Create a new vision project
- Access RobVision: Open RobCo Studio and navigate to the RobVision section.
- Add Project: Click Add Project.
- Configure Project: Name the project and choose the project type. A CAD picking project is defined by a 3D file of the part. With label picking you upload and label images of the part you want to pick.
For a CAD picking project:
- Upload CAD Model: Upload the CAD model file (either .obj or .step format).
- Define camera facing orientation: In the visualizer, rotate the part to define the surface that will face the camera during operation. Ensure the desired camera-facing surface is clearly visible.
- Select Texture/Color: Choose a texture or color for the part.

For a label picking project:
- Upload Images: Upload images showing the parts. One or more images per class are possible.
- Label: Click on the object to auto-label. If the auto-label is not perfect, use the brush tool to adjust the label. You can only label one object per image.
- Enter Info: Enter class name and object size.

Optionally, you can upload background images of the deployment environment (photos of the empty table, bin or conveyor). Training with real backgrounds improves detection robustness.
- Advanced Settings: Configure advanced settings as described below.
- Confirm: Confirm the part details. The project page opens directly.
Advanced Settings
The standard training setup should suffice in most cases. In rare cases you can configure the following setups:
Activate flip: trains the rotation model from top and bottom side, useful when those sides differ a lot (only CAD picking)
Keep Texture: Keeps the texture of the 3D object, instead of overwriting it with the chosen texture. Works only with .glb files that contain a texture (only CAD picking)
Part Symmetry: Limits the angle the rotation model is trained on, when the part is symmetric in a way that it repeats itself after a certain angle (e.g. 90° for a cube)
Resolution Angle: The resolution with which the rotation model is going to be trained
Train the base model
- Open the project's Overview tab.
- In the workflow, click Train Base Model.
- The training status updates automatically — no reload needed. Once the run finishes, the model appears on the Models tab.
Only one training can run per project at a time. A running training can be stopped from the Models tab; a stopped training is marked as canceled and a new one has to start from scratch.
If the trained model does not detect all parts reliably after deployment, label real images from the line and fine-tune a new model version — see Labeling & Fine-Tuning.
Model versions
The Models tab lists every training run of the project with:
- the model name and version, and whether it is the base model or refined with images,
- the live training status,
- the Control Units the version is deployed on,
- per-version actions (deploy, stop a running training).
Deploy a model
- Verify Connectivity: Ensure the Robot's Control Unit has a stable internet connection and is properly connected to the RobVision Device, as previously configured.
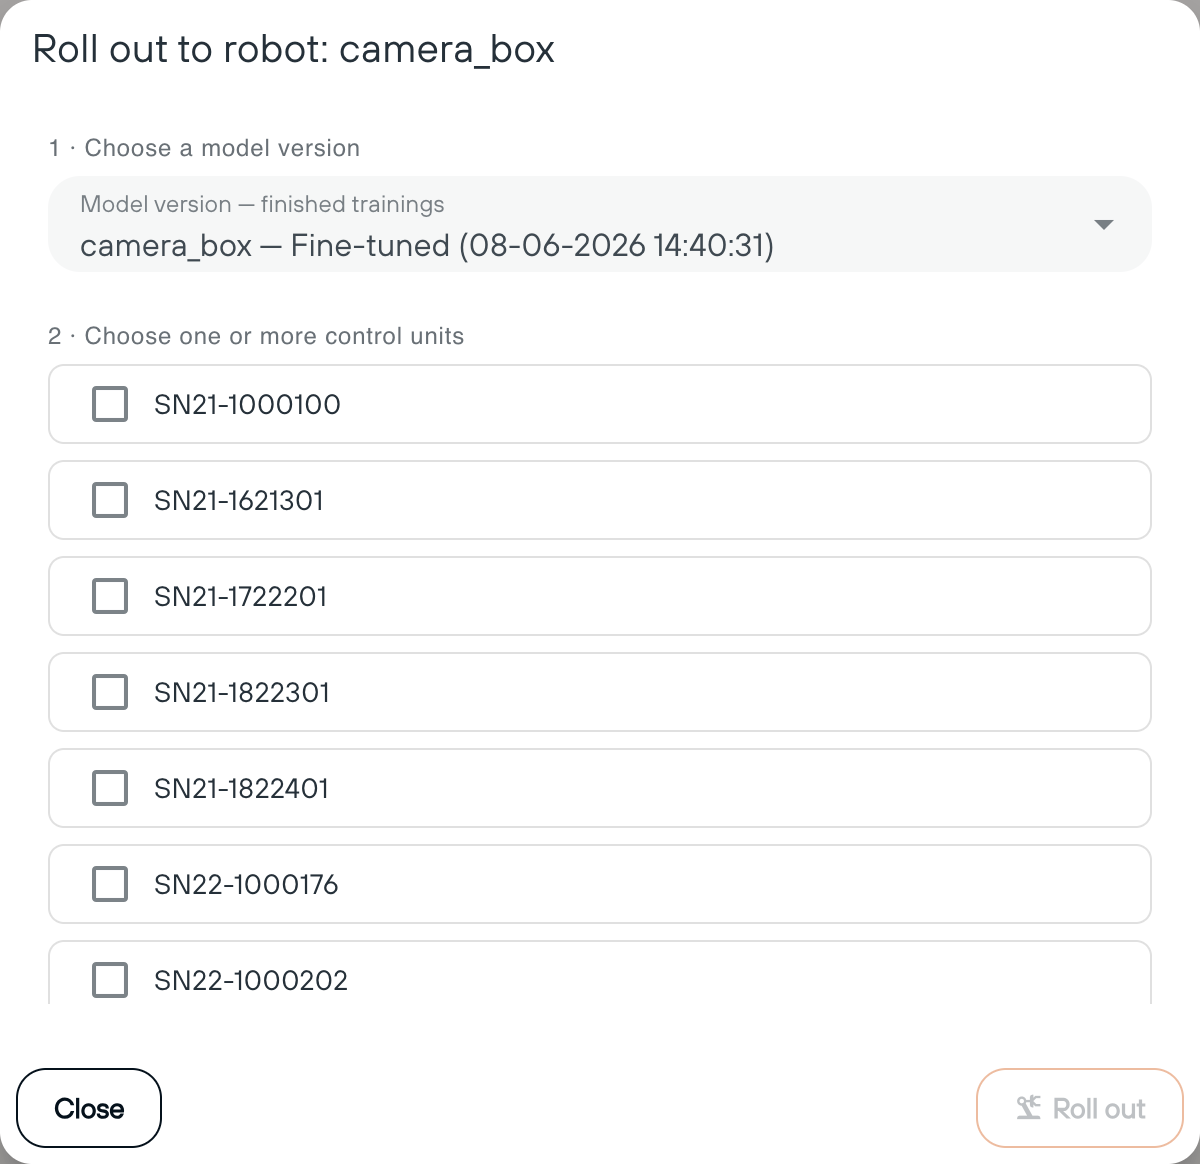
- Open the dialog: On the Models tab, click Deploy to Robot (or the deploy action on a specific version).
- Choose a model version: Any successfully trained version can be deployed. If you pick an older version while a newer one exists, a warning marks the rollback.
- Choose Control Units: Select one or more Control Units. Units that already run a version of this project are listed first, with a chip showing which version they currently run.
- Roll out: The dialog reports the outcome per Control Unit. Failed units stay selected, so a failed rollout can be retried directly.
After a successful rollout, the deployed model name and version are shown with the RobVision solution in RobFlow.
Members and archiving
On the Members tab you can share the project: add a member by their email address, or leave the project yourself. Instead of deleting, projects are archived via the ... menu next to the breadcrumb — an archived project becomes read-only for all members and can be unarchived from the same menu.