Labeling & Fine-Tuning
A base model is trained without ever seeing your real scene. If it does not detect all parts reliably — wrong lighting, occlusions, unusual part positions — you can improve it with real-world data: import images captured on the line, label the parts in them, and train a refined model version from the labels. All of this happens on the Labeling tab of the vision project in RobCo Studio.
The workflow is:
- Import images from a RobFlow results export.
- Label the parts in each image and mark the image as labeled.
- Train a new model version from the labeled images.
- Deploy the refined version like any other model.
Only one project member can label at a time: while someone is annotating, the Labeling tab shows who currently holds the project and becomes available again shortly after they close the editor.
Import images
- On the Labeling tab, click Import Images.
- Upload a RobFlow results export (.zip). Each captured frame becomes an image to label. Frames where the deployed model already detected something arrive prelabeled — you review and correct instead of starting from scratch.
- Images that were already imported earlier are recognized and skipped, so re-importing an overlapping export is safe.
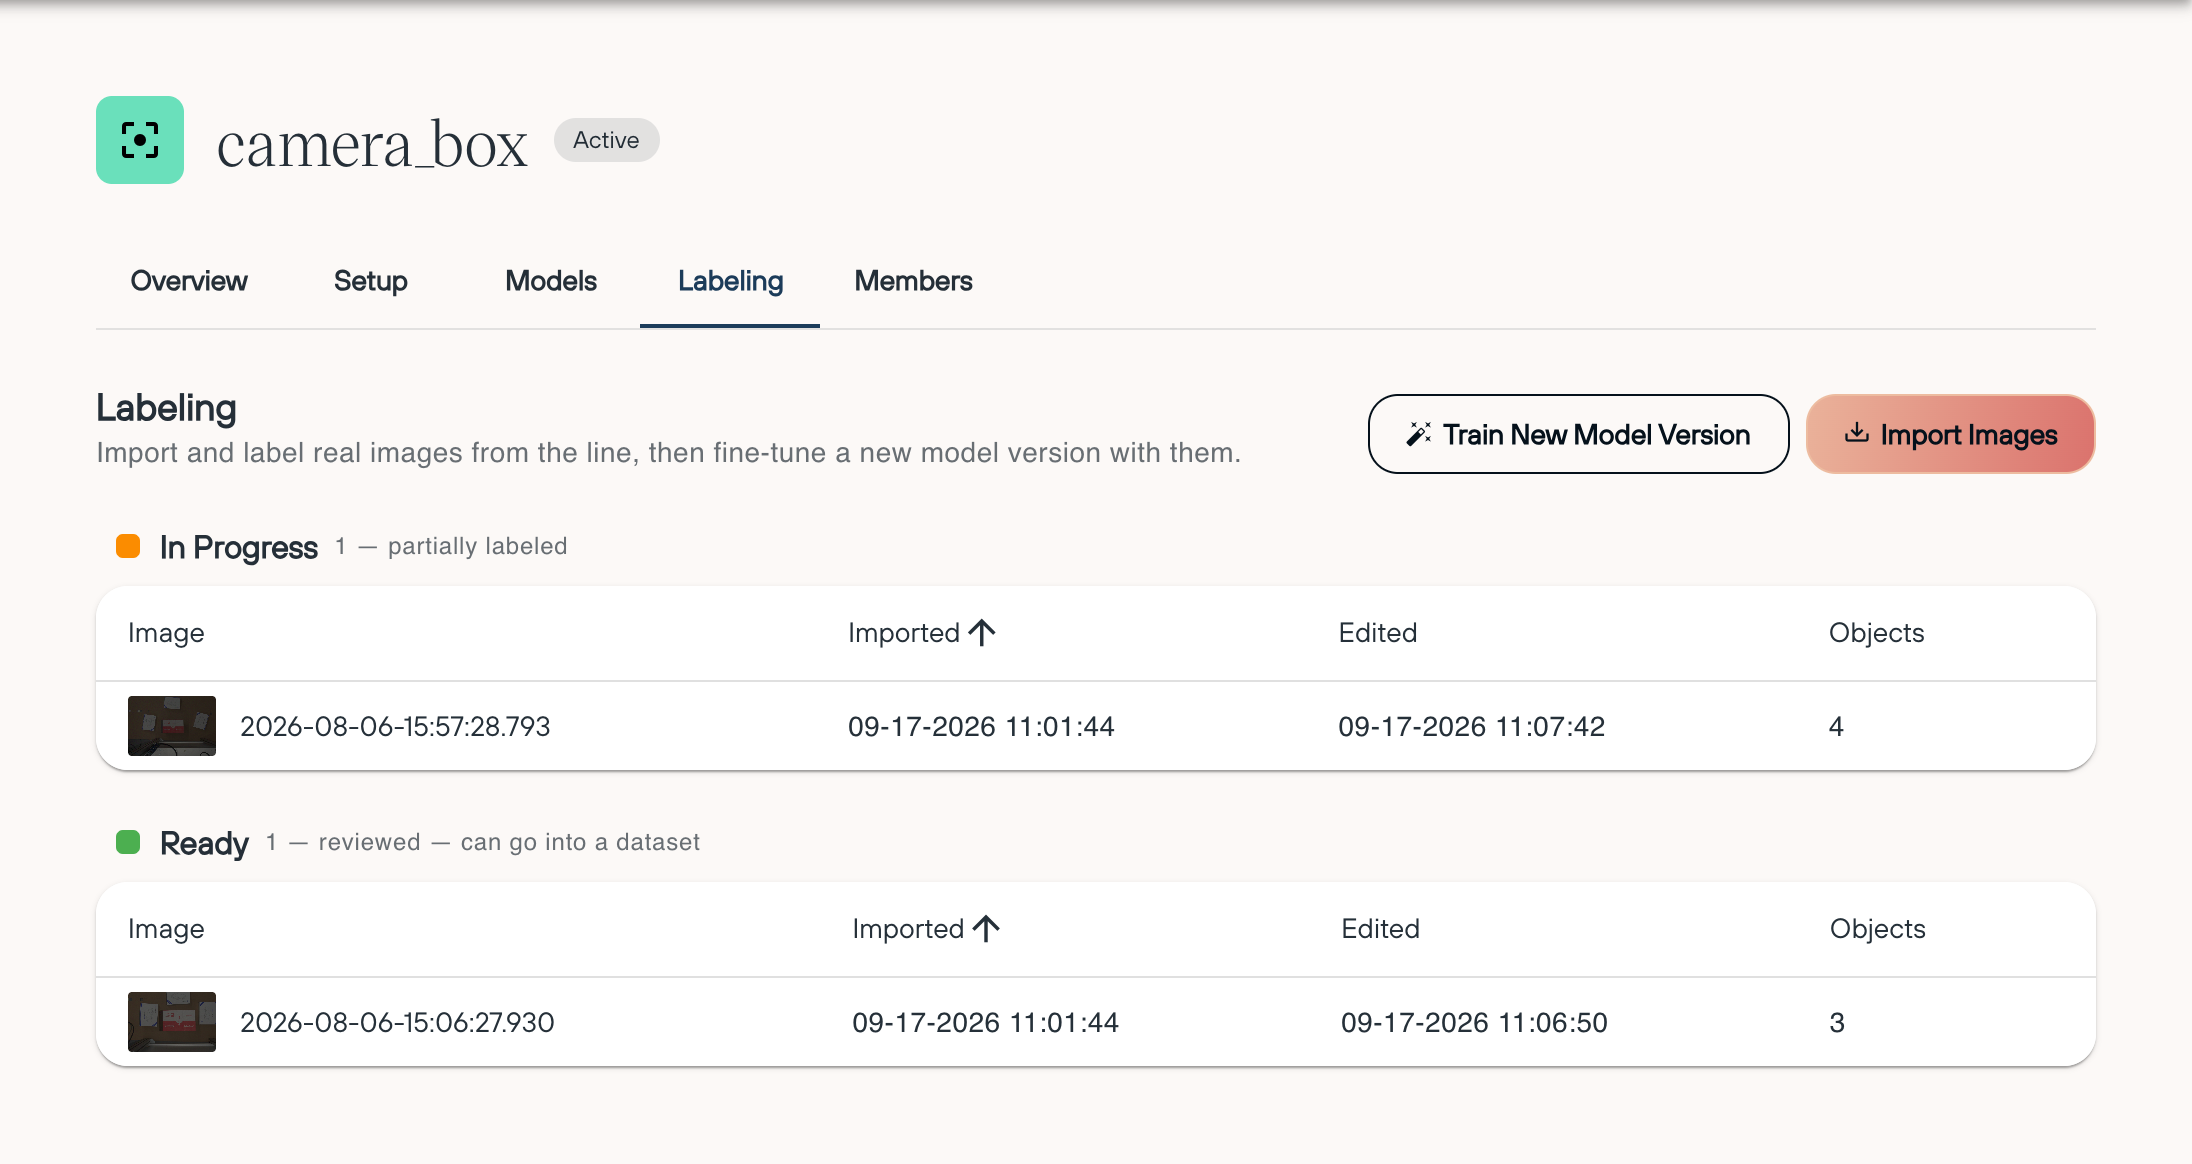
The imported images are grouped by state:
- To Label — imported, waiting for review.
- In Progress — partially labeled.
- Ready — reviewed and marked as labeled; can go into a dataset.
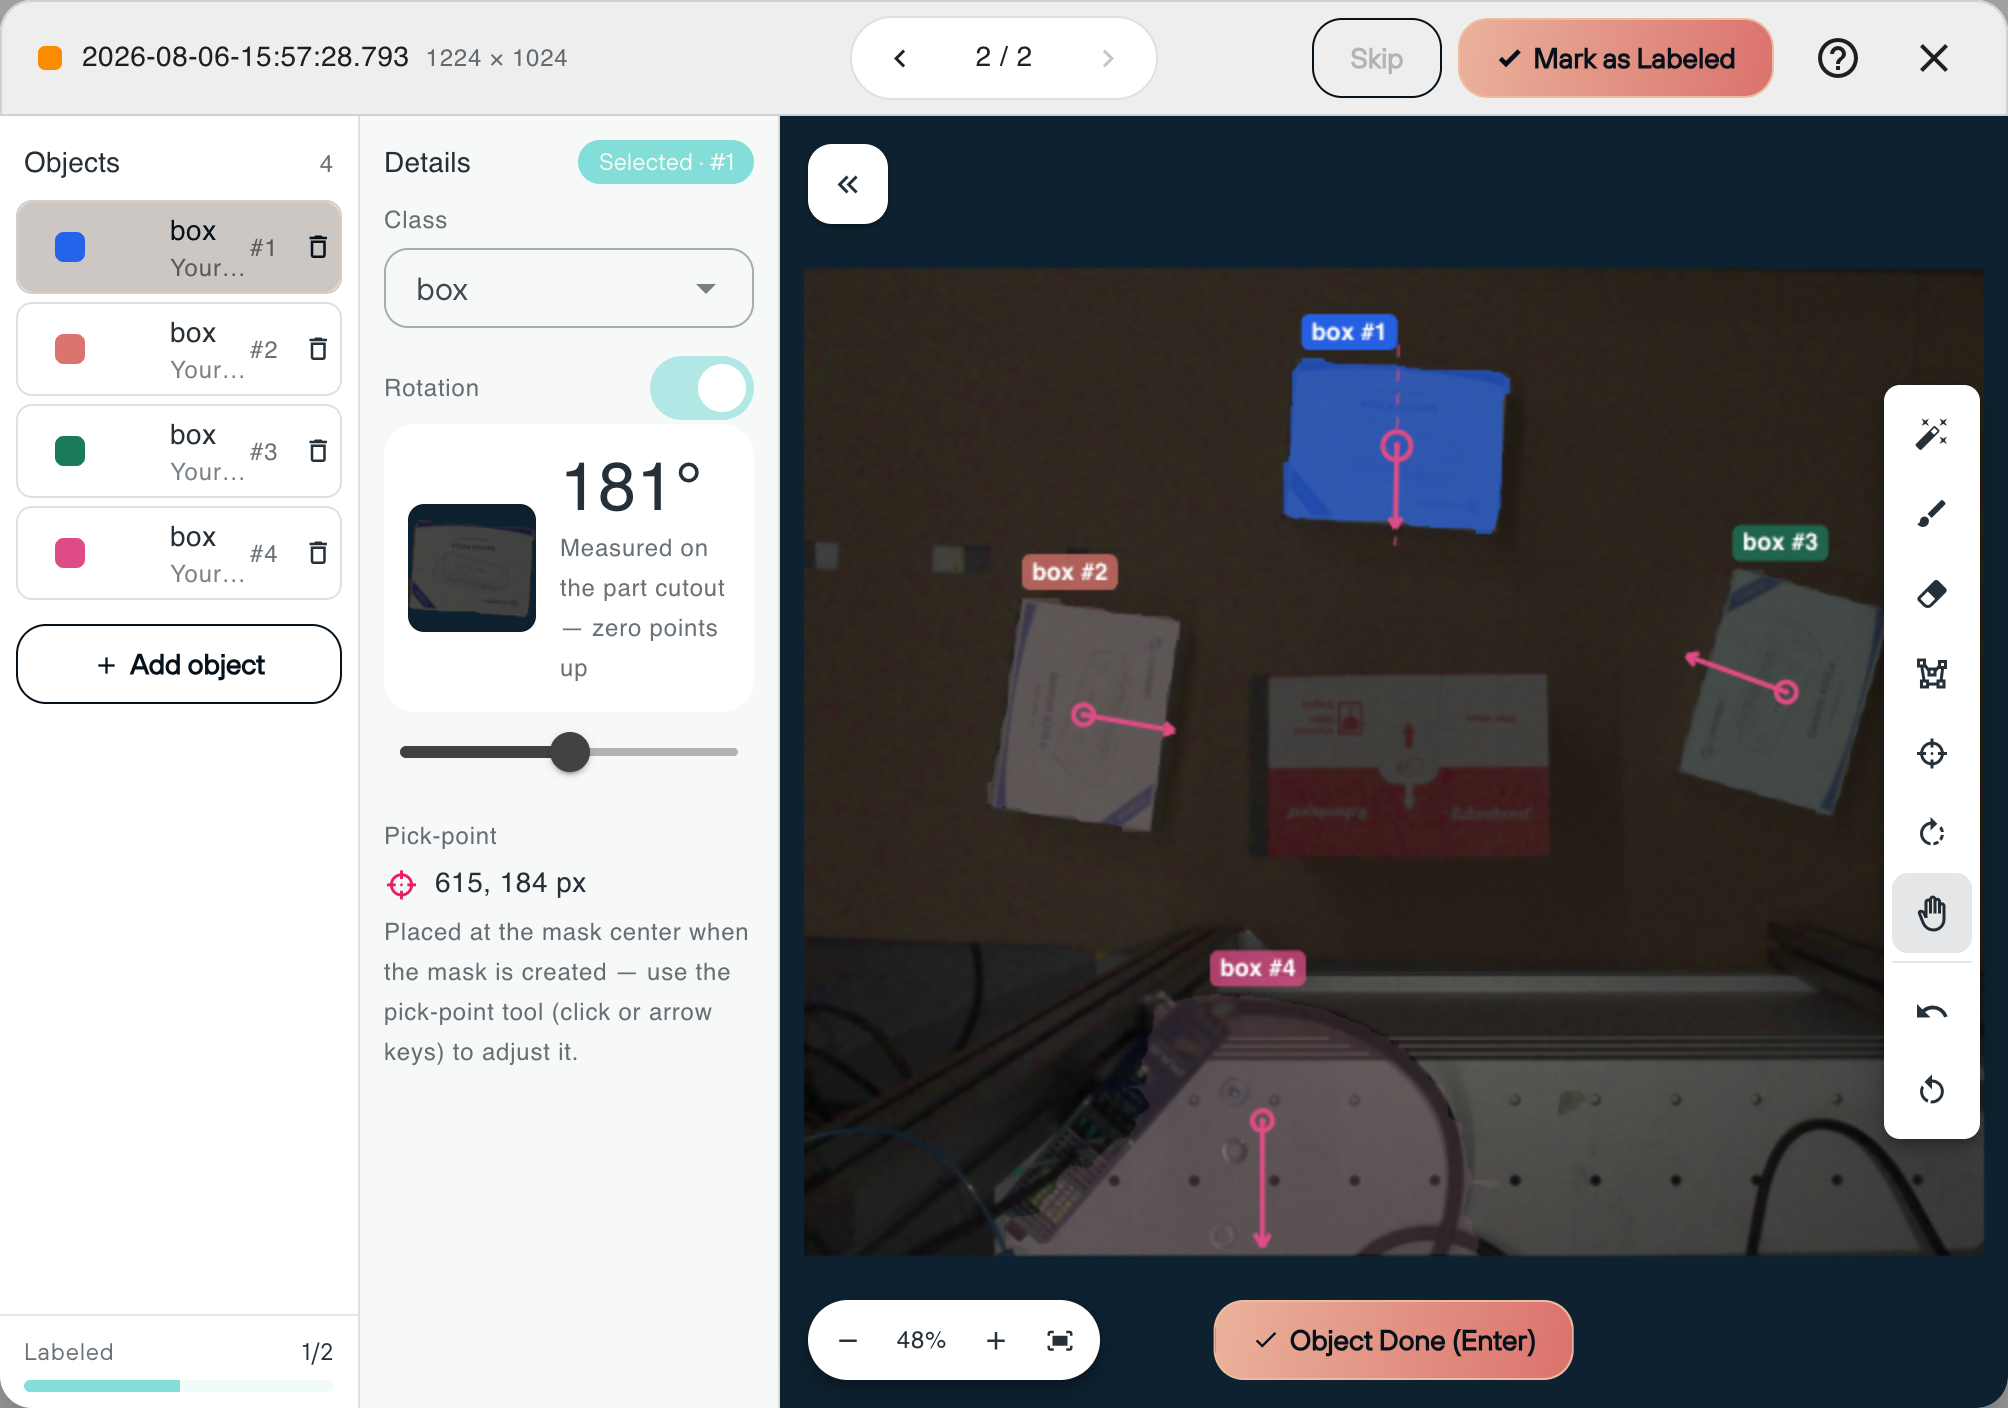
The labeling editor
Clicking an image opens the labeling editor. The left panel lists the labeled objects, the canvas shows the image, and the right panel shows the details of the selected object (class, rotation, pick-point). On small windows both panels can be collapsed to give the image the full width.
When you open a project for labeling the first time, the editor asks whether this project should label rotation angles. Parts with a distinct orientation need a rotation angle per object; round parts, or projects using PCA pose estimation, can skip it. The choice can be changed later in the Details panel.
Drawing masks
Every object is labeled as a pixel mask. Three tools create and refine masks:
- AI Segmentation (S) — hover over a part to preview the mask a click would produce; click to commit it. Additional clicks refine the mask: positive clicks add regions, negative clicks remove them.
- Brush (B) and Eraser (E) — paint or remove mask pixels directly. The brush size adapts to the zoom level.
- Polygon (P) — click to add points around the part; clicking the first point closes the polygon.
While an object is selected, the other objects' masks are shown desaturated so the edit target is unmistakable. Mistakes can be undone step by step (Undo, Ctrl+Z) or the whole image reset to its prelabel.
Class, pick-point and rotation
- Class: Every object needs a class. Assign it in the Details panel — only the project's classes are offered.
- Pick-point (K): The point the Robot aims for. It is placed at the mask center automatically when the mask is created; use the pick-point tool (click or arrow keys) to adjust it.
- Rotation (R): If the project labels rotation angles, point the object-sized arrow in the part's reference direction — drag it with the mouse or fine-tune with the arrow keys. A dashed guide across the object helps with alignment.
Finishing an image
- Object Done (Enter) finishes the current object — the next click on the image starts the next one.
- The image is autosaved while you work; the save state is always visible in the toolbar.
- When every part in the image is labeled, click Mark as Labeled. The image moves to Ready and is locked against accidental edits — Unlock for Editing reopens it.
- An image without any objects can also be marked as labeled: this confirms the image contains no parts and trains the model against false positives.
Keyboard shortcuts
| Key | Action |
|---|---|
| H or Esc | Pan |
| S | AI Segmentation |
| B / E | Brush / Eraser |
| P | Polygon |
| K | Pick-point |
| R | Rotation |
| Arrow keys | Fine-tune rotation or pick-point (with the tool active) |
| Enter | Object Done |
| Ctrl+Z | Undo |
Train a new model version
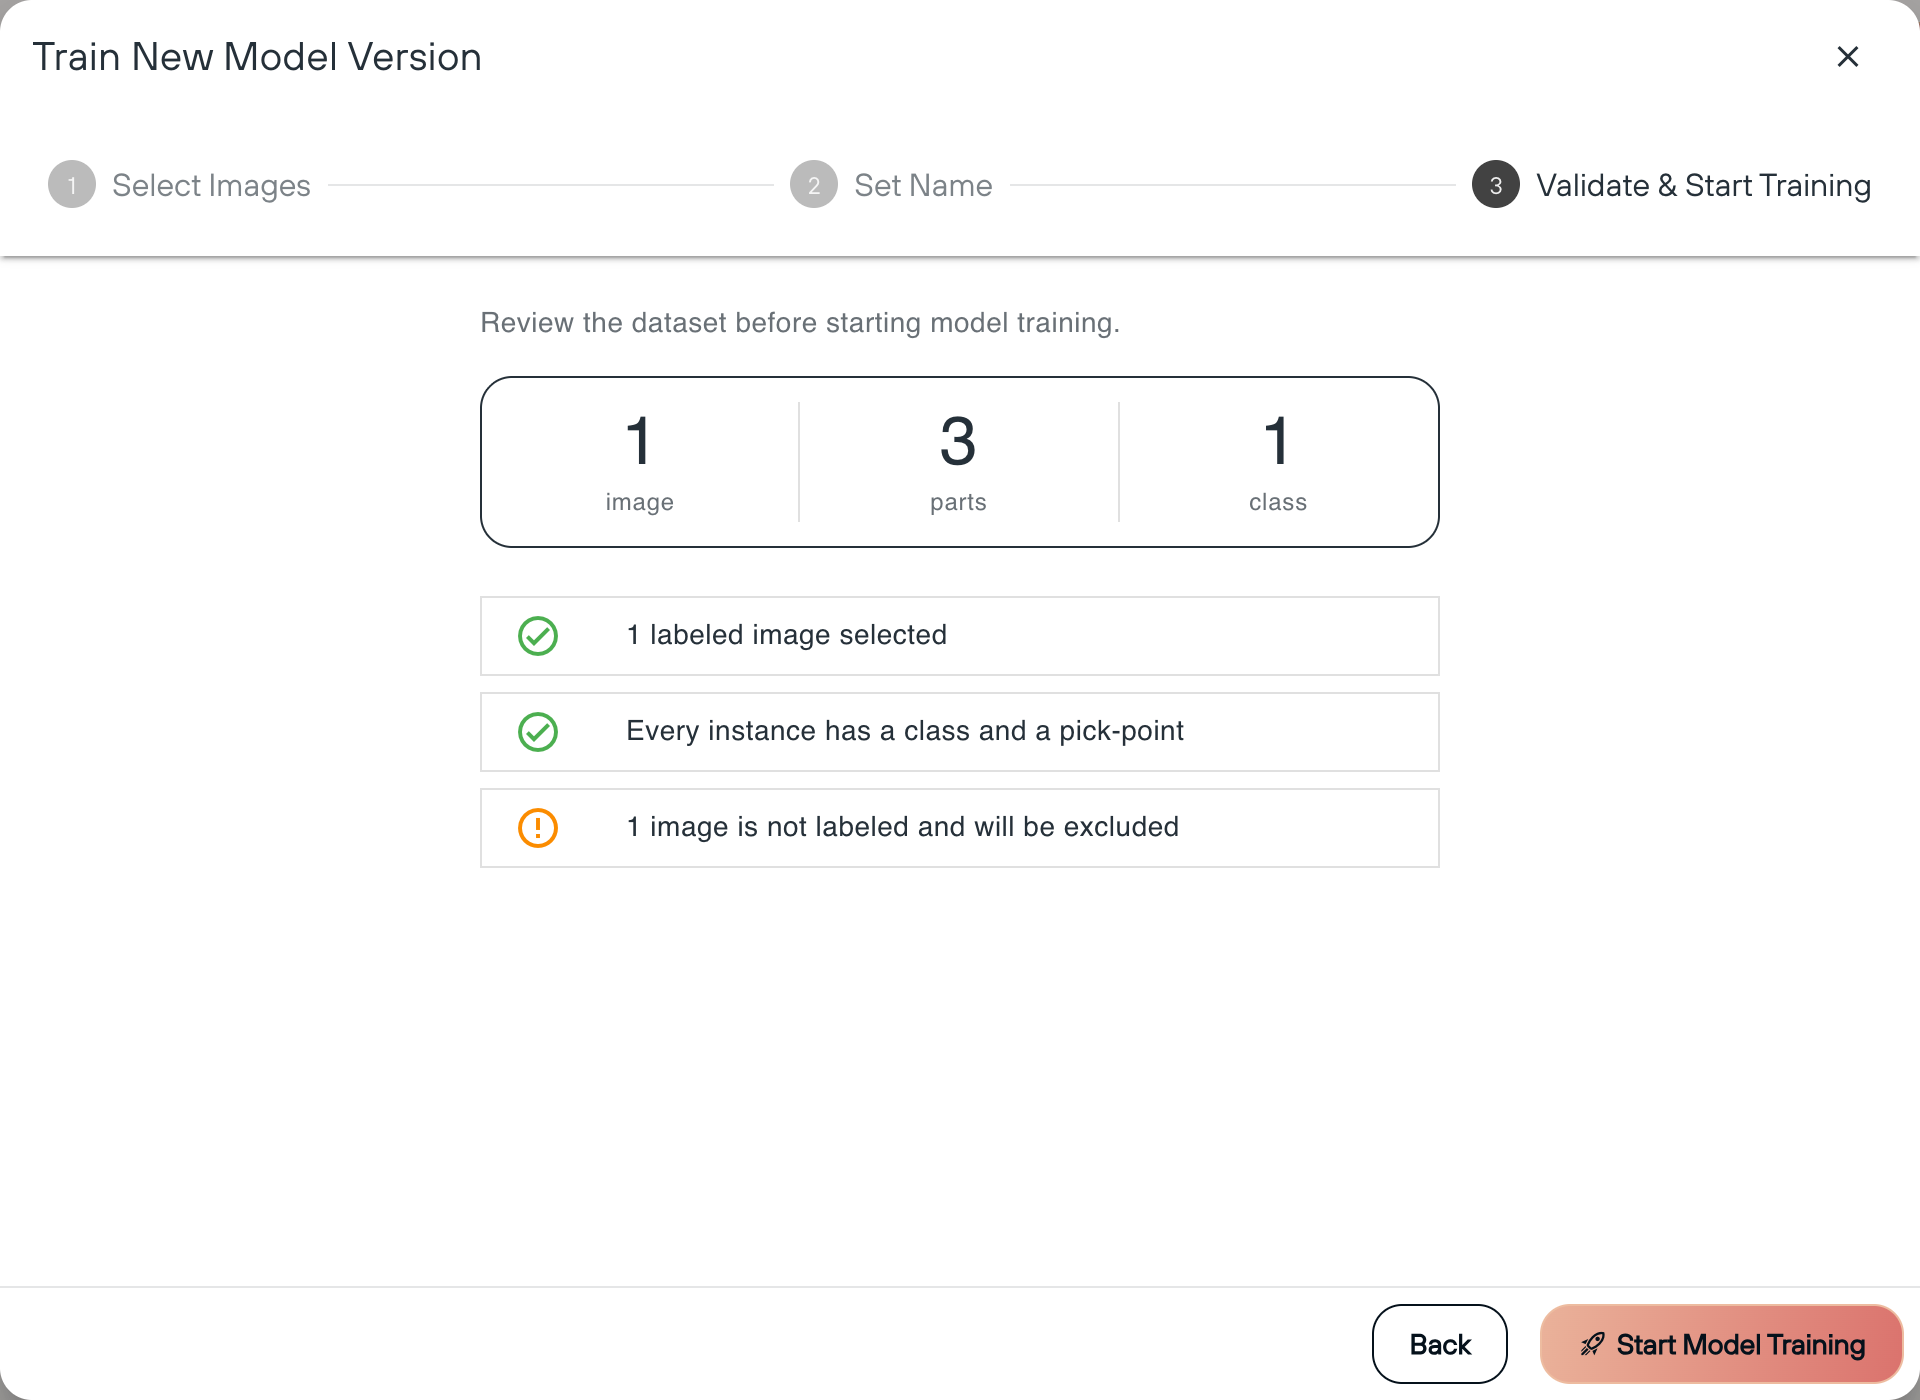
- On the Labeling tab, click Train New Model Version.
- Select Images: Pick the labeled images to include in this training run. Only Ready images can go into a dataset.
- Set Name: Name this training run. The selected labels are snapshotted as a new dataset version — earlier versions stay intact.
- Validate & Start Training: Review the dataset summary (images, objects, classes) and start the run.
The run appears on the Models tab as a version refined with images, next to the base model. Only one training can run per project at a time. Once it finishes successfully, deploy it — and if the results can still improve, import more images and repeat: every round of real-world labels makes the next version better.